Using the Public Cloud Connections Wizard
Using the Public Cloud Connections Wizard
#380290
The Public Cloud Connections wizard guides you through the steps to create and schedule daily data collection from your public cloud instances. Collected configuration and workload data is then analyzed and used to recommend sizing and placement optimization opportunities.
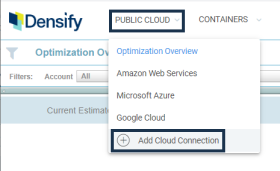
The Public Cloud Connections wizard is accessible from the Densify Console's landing page or from the Public Cloud >  Add Cloud Connection dropdown menu. See
The following cloud platforms are supported through the Public Cloud Connections wizard:
You can modify the connections once they have been created:
- Edit Connections
- Review Connections
- Configure Public Cloud Connections to use a Proxy Server
- Delete Connections
- Change Credentials
Additionally, you can collect and analyze AWS data through the Densify API. Refer to the following use case for an example of API data collection:
- Optimizing AWS EC2 Instances
- Optimizing Microsoft Azure Virtual Machine Instances
- Optimizing GCP Compute Engine Instances
Considerations when Working with Large Environments
In large environments, Densify highly recommends batching your accounts into smaller groups for improved performance when creating the cloud connections. i.e. 10 accounts at a time. You can use a resource tag, such as organization or business unit to split the total number of accounts so that data is collected in manageable batches.
Configuring a Connection to AWS
You can connect to your AWS account with the following method:
- IAM User and Access keys—This process prompts you to enter your AWS credentials for either configuration/workload data. Your information is verified and can then be saved. Densify then creates the required audits and analyses and schedules them to run regularly.
- IAM Role—An IAM cross-account role that establishes a trust relationship between AWS accounts. In order to create the connection you need the prerequisite information, including the external ID and Role ARN. See:
Using the Public Cloud Connections Wizard—IAM Role
- On the Densify landing page, click Connect to your AWS accounts.
- Click on the Amazon Web Services tab.
- Select Connect Using: "IAM Role".
- The Densify Account ID is predefined. This value must match the value you entered when you created the role in AWS.
- Enter the AWS-specific connection parameters, as listed in the table below. Refer to
- Once your AWS connection parameters are entered, verify your connection using Click to Verify Account Connection.
- If the credentials are valid, you will be connected and authenticated. Once the account is verified, Densify discovers the AWS account ID and displays the ID number. See Table: AWS Account ID and Connection Type Parameters below.
- If the credentials cannot be validated, then review the displayed error message and correct your credentials. It is possible that the user account does not have the required permissions. See
- After you have specified the connection name click Save Connection.
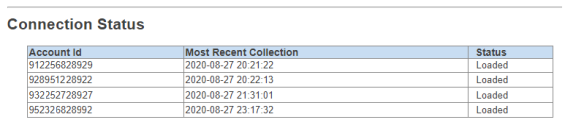
- The connection status, at the bottom of the page, will be updated. You will also see the connection listed in the Saved Connections section.
- If you want to add another connection, click Add New Connection and follow steps 3 to 7 again to configure the connection.
- Close the Public Cloud Connections page once you have completed creating all your AWS connections.
or
from the Densify Console, navigate to Public Cloud > Add Cloud Connection.
Table: AWS Connection Parameters - IAM Role
|
Field |
Description |
|
External ID |
The external ID specified for Densify, when you created the IAM role in AWS. If you need to edit or review a saved connection, for security reasons, you will need to re-enter the external ID. |
|
Role ARN |
The Amazon Resource Name (ARN) for IAM role that you created in AWS. |
Note: The External ID and the Role ARN are encrypted and are not displayed as plain text in log files.
Note: The number of instances returned is a high level estimate obtained when Densify verifies the connectivity. It may not match the number of instances discovered during the more detailed, scheduled data collection.
The Save Connection button is disabled until the connection is successfully verified for both create new and edit modes.
For resource utilization data, the initial audit collects the last 60 days of data, if available, and each, subsequent daily audit collects the last 24 hours of data.
Once the connection has been verified data collection starts.
Using the Public Cloud Connections Wizard—IAM User and Access Keys
-
- Click on the Amazon Web Services tab.
- Select the connection type:
- Resource Utilization Metrics— This connection type is for collecting CloudWatch data.
- Enter the AWS-specific connection parameters, as listed in the table below.
- Once your AWS connection parameters are entered, verify your connection. Click Click to Verify Account Connection.
- If the credentials are valid, you will be connected and authenticated. Once the account is verified, Densify discovers the AWS account ID and displays the ID number. See Using the Public Cloud Connections Wizard below.
- If the credentials cannot be validated, then review the displayed error message and correct your credentials. It is possible that the user account does not have the required permissions. See AWS Data Collection Prerequisites for an IAM Role (CloudWatch only) for details.
- After you have specified the connection name click Save Connection.
- The connection status, at the bottom of the page, will be updated. You will also see the connection listed in the Saved Connections section.
- If you want to add another connection, click Add New Connection and follow steps 3 - 7 again to configure the connection.
- Close the Public Cloud Connections page once you have completed creating all your AWS connections.
Table: AWS Connection Parameters - Resource Utilization Metrics
|
Field |
Description |
|
Access Key Id |
The public cloud's IAM (Identity and Access Management), user access key ID and secret access key. |
|
Secret Access Key |
For CloudWatch data, the initial data collection audit will pick up the last 60 days of data, if available, and each daily audit will collect the last 24 hours of data.
Once the connection has been verified data collection starts.
Configuring a Connection to Microsoft Azure
There are two methods for creating Azure connections:
- User Credentials— supports Azure Cloud through the standalone Azure Active Directory. See
- Service Principal—A Service Principal allows you to access one or more resources within your local active directory. See
Click the Microsoft Azure tab to create a connection to your Azure environments. You will enter your Connection Name and an account user name and password in order to collect configuration, workload data from your hosted infrastructure.
Your information is verified and the connection can then be saved and is scheduled to run regularly. In order to create the connection you need the relevant account information. See
Using the Public Cloud Connections Wizard
- On the Densify landing page, click Connect to your AWS accounts.
- Click on the Microsoft Azure tab.
- Click the appropriate radio button to select the type of connection to create:
- Resource Utilization Metrics—This connection type is for collecting utilization data.
- Enter the Azure-specific connection parameters. Refer to one of the following topics to obtain the required information:
-
-
- Once your information is entered for all fields, click Click to Verify Account Connection to validate the credentials.
- If the credentials are valid, you will be connected and authenticated. Once the account is verified, all subscriptions that are associated with the account or Application ID are listed. Select the subscriptions that you want to include in the audit.
- If the credentials cannot be validated, then review the displayed error message and correct your credentials. It is possible that the user account does not have the required permissions. The user account/Service Principal to be used for data collection only requires the "Reader" role privileges to collect utilization data. See
- Once the connection has been verified, click Save Connection.
- The connection status, at the bottom of the page, will be updated. You will also see the connection listed in the Saved Connections section.
- Click Add New Connection, to add another connection.
or
from the Densify Console, navigate to Public Cloud > Add Cloud Connection.
Table: Account Information - User Credentials
|
Field |
Description |
|
User Name |
Enter the user name associated with your Azure account. |
|
Password |
Enter the user's password. |
|
Connection Name |
Use the connection name to clearly identify the Azure subscription in Densify. This name will appear in the Saved Connections list. The connection name must be unique within the Azure connection type section, so if the name is already in use, you are prompted to enter a new connection name. Note: The Connection Name is limited to 32-characters. The Connection Wizard prevents you from entering a string that is more than 32-characters. |
Table: Account Information - Service Principal
|
Field |
Description |
|
Application ID |
Specify the Application ID/Service Principal. Both the ID and the corresponding key are provided when you create the application through your Azure portal. |
|
Secret Key |
Enter the key corresponding to your application/service principal. This is called the Client Secret in the Azure portal interface. |
|
Tenant ID |
The tenant ID corresponds to the local Active Directory. |
|
Connection Name |
Specify a name for the connection. This name will appear in the Saved Connections list. If a name is not specified, the Application ID is used. If the name is already in use or the connection exists, you are prompted to enter a new connection/account name. Note: The Connection Name is limited to 32 characters. The Connection Wizard prevents you from entering a string that is more than 32 characters. |
For resource utilization data, the initial audit collects the last 60 days of data, if available, and each, subsequent daily audit collects the last 24 hours of data.
Once the connection has been verified data collection is scheduled.
Note: If you create another connection, you must ensure subscriptions are not included in more than one cloud connection.
Configuring a Connection to Google Cloud Platform
Other Public Cloud Connections Features
These are common Public Cloud Connections features:
Accessing the Wizard from the Densify Console
Once you have collected data and are using the Densify Console you will not see the Densify landing page.
You can still access the Cloud Connections wizard from the Public Cloud > Add Cloud Connection menu.
You can edit a saved connection directly from the Public Cloud Connections wizard.
You cannot edit the user name or credentials. If you want to change the credentials, you need to delete the existing connection and create a new one with the new credentials.
- For AWS connections you can modify the External ID.
- For Azure connections you can change the Subscriptions In Scope.
- For Google Cloud connections you can provide a new Service Account Key File. See Using the Public Cloud Connections Wizard, above.
- Select a cloud provider. Only connections for the selected provider are displayed in the Saved Connections list.
- Select the connection to be modified from the Saved Connections list. The current connection settings are displayed. Displayed settings change depending on the selected cloud provider:
- Review the existing information and make your changes, as required.
- Click Click to Verify Account Connection.
- Once the connection has been verified, click Save Connection to update the connection.
You can edit a saved connection directly from the Public Cloud Connections wizard. You can also view the status of the most recent connection.
You cannot edit the user name or equivalent settings. If you need to change the credentials, you will need to delete the existing connection and create a new one.
This feature can be useful to update passwords that expire regularly. You can also review the status of recent audits.
- Select a cloud provider. Only connection for the selected provider are displayed in the Saved Connections list.
- Select the connection to be modified from the Saved Connections list. The current connection settings are displayed. Displayed settings change depending on the selected cloud provider:
- The connection status for all accounts/subscriptions or projects contained in the selected connection are displayed,
- Review the existing information and update the password, if required.
- Click Click to Verify Account Connection to validate the new setting.
- Once the connection has been verified, click Save Connection to update the connection.
A scroll bar is displayed if there are too many accounts to display in the window.
You can delete a configured connection directly from the Public Cloud Connections wizard.
- Select the required Cloud provider tab. Only the connections for the selected tab are displayed in the Saved Connections
- Select the connection to be deleted from the Saved Connections list and click Delete Connection.
When you delete the connection the audit workspace folder and all of the contained audits are deleted. The account name is removed and is no longer displayed in the Saved Connections list.
You need to delete and recreate the AWS and Azure connections to change credentials.
When you delete a connection, the corresponding cloud environments are not deleted. They are no longer refreshed as there is no new data collection. Historical data for the account is maintained in the database. If you re-create a connection for the same account using the wizard, the new audits automatically link to the existing cloud environment and historical data.
Configuring Public Cloud Connections to use a Proxy Server
You can configure your public cloud connection to use a proxy server, for additional security.
- Proxy server name
- Proxy server access port
- User Name and encrypted password, if authentication is required
Next Steps
Once the connection has been created, you will be contacted within one business day to confirm your data has been loaded and analyzed. You can then do the following:
- View and address instance sizing recommendations. See the following reports:
- Public Cloud > Optimization Overview—An aggregated report for all your cloud instances. The scope of systems is defined by various filters. See
- Public Cloud > Cloud Provider—Reports that are specific to the selected cloud provider. See